
Photon Vision Simulations Example
This will outline the basic steps for setting up a photon vision sim with the new sim overhaul from photon vision. There were few resources out there so this is just an example to get up and running with integrations with advantage kit for viewing.
Library install (If still in prerelease)
clone the latest development version of photonvision then build the library following the following steps outlined in the official documentation and outlined below.
in the photonvision folder run the following to build and install a local copy of the latest library
./gradlew generateVendorJson
./gradlew publishToMavenLocal
be sure to add the vendor json photon-lib/build/generated/vendordeps/photonlib.json and add the local maven repository tag in your build.gradle
repositories {
    mavenLocal()
}
VisionSystemSim Initialization
the new system revolves around the class VisionSystemSim (Note this is different than the official soon to be deprecated SimVision). This class is responsible for updates and coordination of simulated elements and "real" interfaces. Photon Vision relies on NT4 and thus the simulation only has to spoof publish to the same topics a real camera object would receive on.
First lets create a subsystem to hold and call a periodic function to update the simulation.
public class SimPhotonVision extends SubsystemBase{
  public SimVisionSystem() {
  }
  @Override
  public void periodic() {
  }
}
Create the VisionSystemSim
public class SimPhotonVision extends SubsystemBase{
  VisionSystemSim simVision = new VisionSystemSim("photonvision");
then we would like to setup a Transform3d to represent the position of the simulated camera
  double camPitch = Units.degreesToRadians(10); // radians
  double camHeightOffGround = 0.8; // meters
  Transform3d cameratrans = new Transform3d(
    new Translation3d(0.0, 0, camHeightOffGround), new Rotation3d(0, camPitch, 0));
Then create the real camera object if not already defined in the real robot code. then create the simulated camera object which is linked to the real camera to spoof the NT4 readings for it. The PhotonCameraSim also allows for a json to be loaded to mimick the exact setup of your hardware. I have selected a preset Limelight default which sets the lens distortion and latency. The final two parameters set the percent for tag detection and the max detection range in meters
PhotonCamera realCam;
PhotonCameraSim simCam;
public SimPhotonVision() {
    realCam = new PhotonCamera("camera1");
    simCam = new PhotonCameraSim(realCam, SimCameraProperties.LL2_960_720(),0.05,20);
Once the simCam has been created it needs to be added to the instance of VisionSystemSim passing the simulated camera and the Transform3d representing its location relative to the robot origin.
simVision.addCamera(simCam, cameratrans);Next targets must be added to the vision system. I have added the default targets from the AprilTagFields object. This can throw and exception to so for now we lazily catch it.
try {
    simVision.addVisionTargets(AprilTagFields.k2023ChargedUp.loadAprilTagLayoutField());
}
catch(Exception e) {
    System.out.println("woops can't load the field");
}
Manual targets can be added. One pitfall is that the apriltag ID MUST be set when constructing. ex new VisionTargetSim( targetpose3d, TargetModel.kTag16h5, ID)
Example of a manual target being added
//Example Manual Target Added
simVision.addVisionTargets(new VisionTargetSim(t2pose,TargetModel.kTag16h5,2));
Periodic Update
Inside the periodic a robot pose must be given to the vision simulation to generate the frames. This is outside the scope of the current article but there are examples of how that can be simulated in the official photon vision documentation here.
This can either be a Pose3d or Pose2d. I have opted to pass in a Pose2d
public void periodic() {
  Pose2d currentPose = Drivetrain.getInstance().getPose();
  Pose3d current3d = new Pose3d(currentPose)
  simVision.update(currentPose);
Now results can be read from the real camera interface as if it was connected to hardware!
Just remember to check the results to see if hasTargets() is true
var results = realCam.getLatestResult();
if (results.hasTargets()) {
  //log targets
}
else {
  //log empty list
}
AdvantageKit Logging Results (optional)
Advantage kit can take in a series of Pose3d objects to be displayed at vision targets. There is a small amount of processing that converts the transforms into concrete3d Poses for display
ArrayList<Pose3d> targets = new ArrayList<Pose3d>();
for(PhotonTrackedTarget t :realCam.getLatestResult().getTargets()) {
    targets.add(current3d.transformBy(cameratrans).transformBy(t.getBestCameraToTarget()));
}
Logger.getInstance().recordOutput("photonvision/targetposes", targets.toArray(newPose3d[targets.size()]));
then if results.hadTargets() is false simply log an empty array
Logger.getInstance().recordOutput("photonvision/targetposes", new Pose3d[] {});Simulation Results
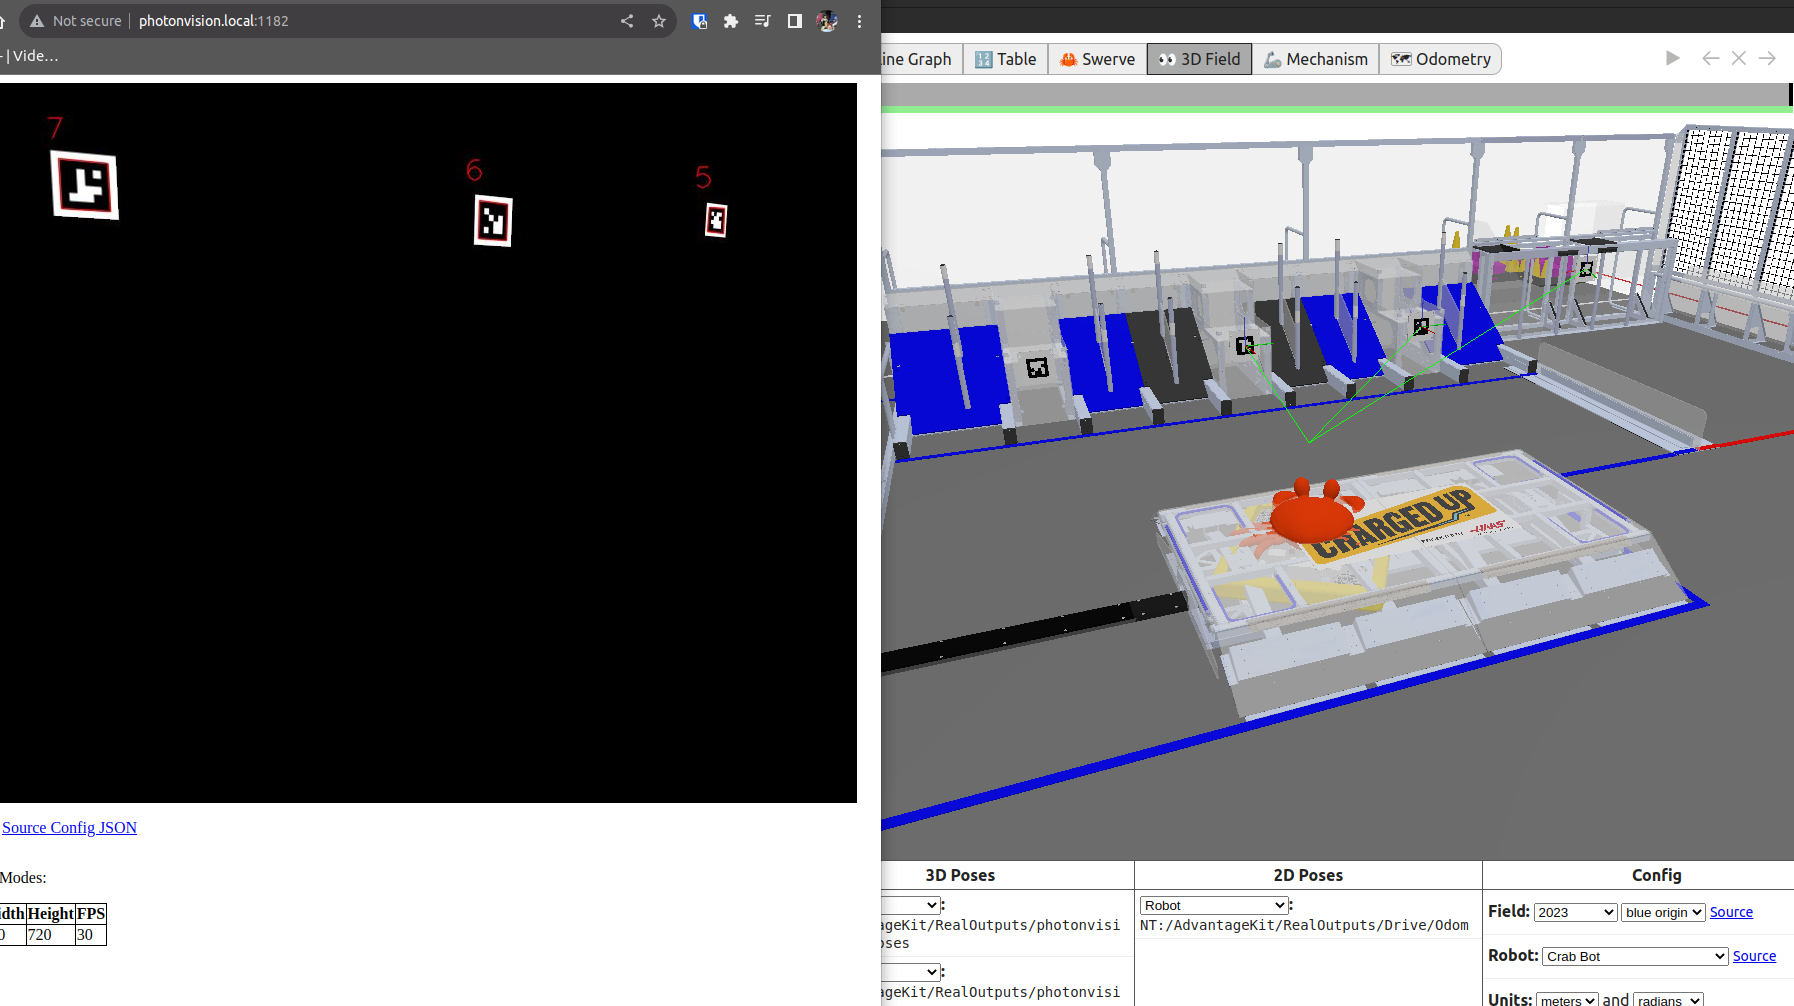
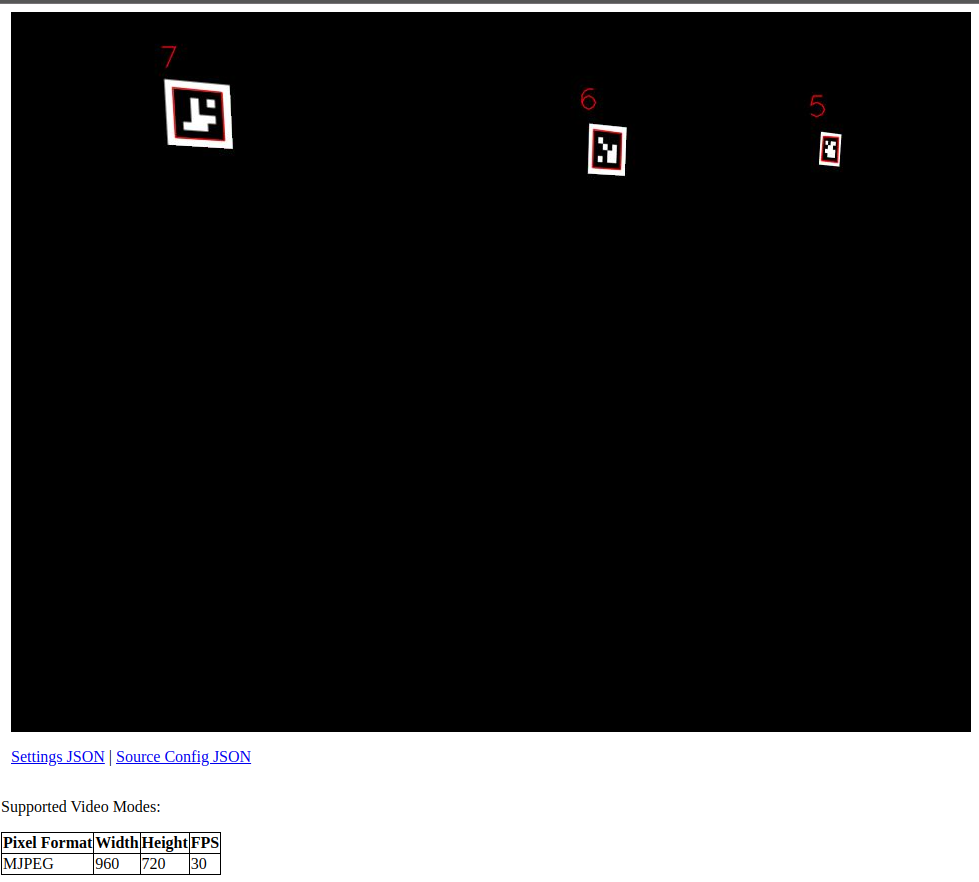
You can view generated frames from the camera at the urls listed in CameraPublisher. Both the Raw and Processed versions. Below is an example of a processed frame.
Ex: http://photonvision.local:1182/
Advantagekit (Optional)
Simulation the robot code with AdvantageKit
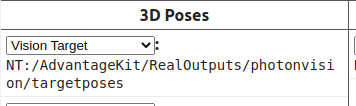
drag AdvantageKit/RealOutputs/photonvision/targetposes to the "3D Poses" section of the "3D Field" then select the outputs then select Vision Target
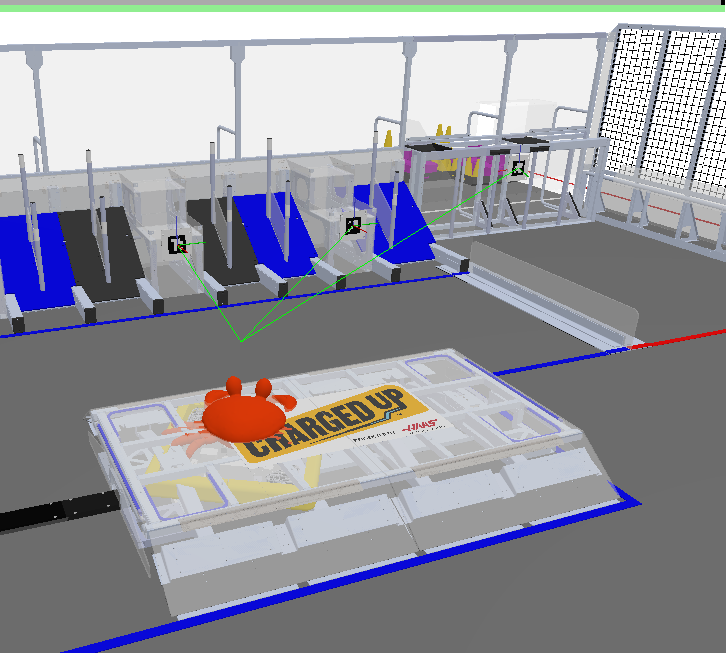
Then set the output of the robot pose to a Robot object in "3D Field". The result should be green lines from the robot to the vision targets'
No Comments